In this article I will describe one technique I discovered of drawing custom images on pixelsv.club. This is not the only technique that exists. However, I believe it is fairly accessible to anyone who wishes to have a little fun with PixelSV. This technique does not require sophisticated hacks, which is why I decided to share it.
Introduction
PixelSV is a website that displays a canvas of one million (1000x1000) pixel squares on which users can draw pixels. The same canvas is shared between users, and all users can see live what others are drawing. This platform is quite similar to the Place project or to PixelCanvas.io, except it uses the BSV blockchain (Bitcoin SV, also known as Bitcoin) as a public database to store and fetch everyone's pixel artwork. After they finish drawing their artwork, users have to swipe their Money Button to store it on the blockchain (a small service fee is also included in the transaction swiped). Because the pixels are stored on the blockchain, it has the following main advantages: the data is decentralised, anyone who has a copy of the blockchain or transactions can access the artworks, the data is read only and the trail of artwork recorded constitute artwork history of the canvas. I will not discuss those aspects in this article, but I will focus on the technique I have used to draw any picture on the canvas with minimum effort.
The context
I was invited by Will Townsend to beta test his PixelSV application a couple of days before its official launch. My first impression was that it was a great piece of software and I immediately remembered seeing similar open online canvas projects before. I also remember (although this may be a false memory) that on those other projects there were pieces of artwork that were very likely automated drawings or at least, not drawn by hand. So, after playing a little with PixelSV and investigating its functioning, I decided to try and automate my drawing as well in order to draw effortlessly anything I want. However, I also wanted to dedicate no more than a few hours of my time to this task.
Reversing the application
My favourite tool at the moment to reverse web-based applications is simply Google Chrome. This web browser provides through the Chrome DevTools all that is needed to efficiently reverse the client-side's code logic and review network interactions between client and server. This is not the only tool I would normally use to test web applications, but I found it fits the purpose for this specific challenge.
After looking at the application's code, I realised it was a bit more complex than I had imagined. It is written in JavaScript, uses WebGL and involves local WebSockets (among other things). I am not very familiar with WebGL so I left it aside. I am however familiar with WebSockets, but I didn't want to involve other tools to alter them. Therefore, I decided to investigate the JavaScript code only.
As seen above, Google Chrome provides the right tools to view the source code of web applications. It can pretty print code, place breakpoints to pause code execution, analyse the code execution step by step and display useful information about the stack and different object properties, including variable values during execution.
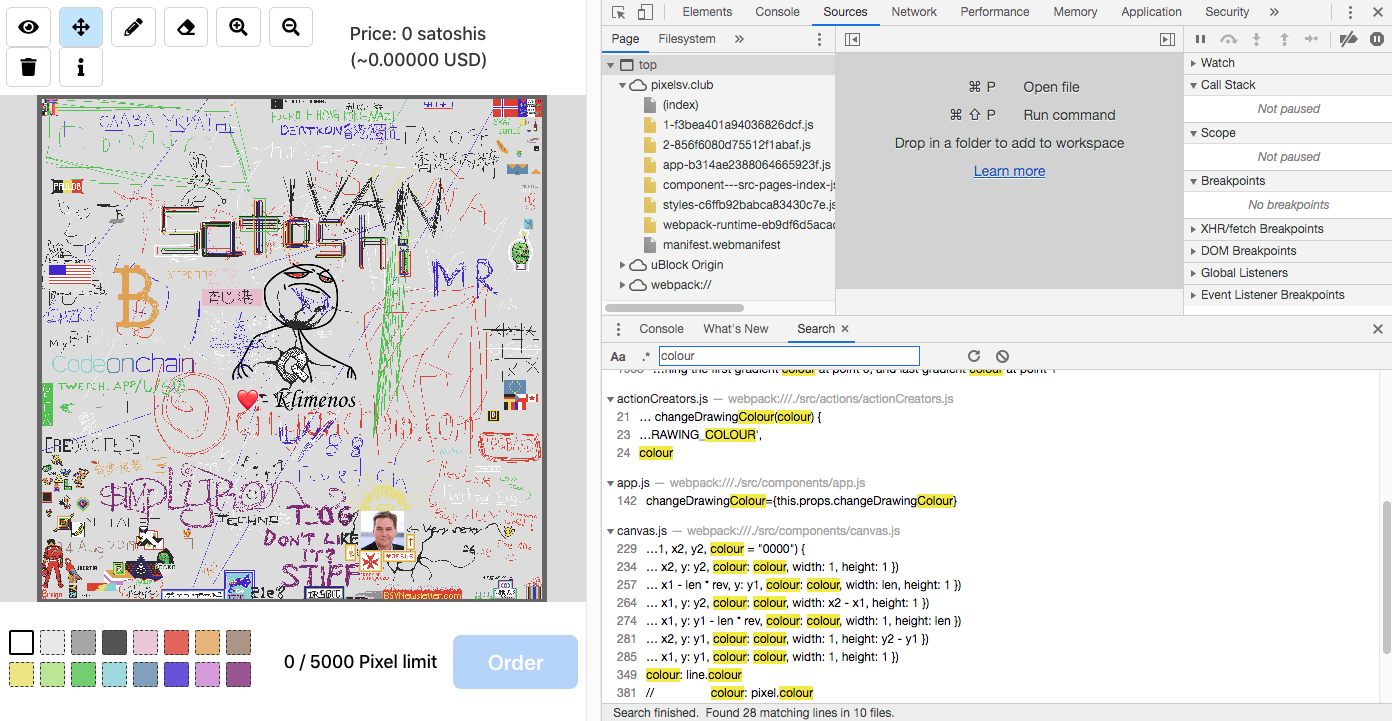
I started looking for keywords such as "colour" and "pixel" in the code as I initially wanted to hook the mouse click actions and replay them. But I soon realised that mouse clicks, positions and colours were dissociated variables and it would take too long to properly combine them all. So I kept looking and discovered a switch statement that contains the case I was looking for: ADD_PIXELS.
However, I was looking more for a function I could call directly. I thought there had to be a function that adds pixels or remove pixels... I kept looking for add_pixel or addpixel... and voilà! I found all the imported functions corresponding to the action calls.

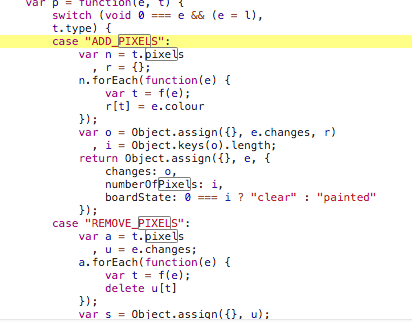
Now, I only had to locate where this addPixels() function was called in the code, and I found instances of it in the 2-XXXXXXX.js JavaScript file (X are redacted). I placed a couple of breakpoints here and there to follow the code step by step and understand what triggers the function, what are its parameters, etc.
What I've noticed is this function was called while I was drawing. And the pixels I drew were stored somewhere in an array. As you can see above, this array contains all the information needed: pixel X and Y positions, colour and dimensions. Then I thought... maybe I could hook the function where this array is generated in the code and add my own custom pixels to the array.
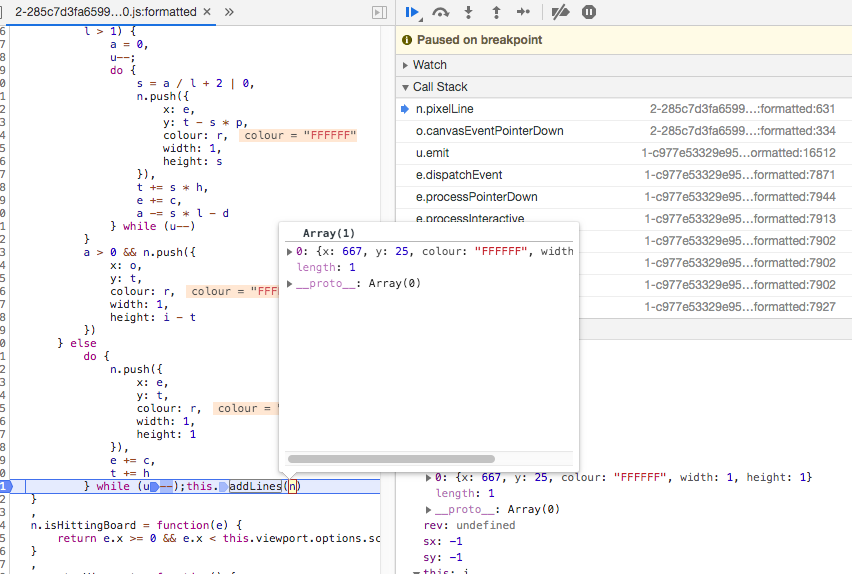
After a few minutes of debugging, I successfully located where this array of pixels was generated in the code. This section was called every time a pixel "draw action" was detected (after a mouse click).
What was left to do at this point was to inject my custom pixels.
PoC||GTFO – Injecting pixels
I initially had in mind to call the addLines() function through the Google Chrome Devtools console directly... But I soon realised I am not an expert with Devtools and couldn't figure out a proper way of doing it, especially because I wanted to call this function without breakpointing anywhere.
My laziness led me to investigate another path – a dirty one – but one that works: How about modifying the JavaScript code directly from the web browser and have this patched version of the code deal with the pixel injection?
So, I downloaded the original 2-XXXXXXX.js file locally and located the line where I needed to inject pixels in the n array: after while(u--); and before this.addLines(n)},.
[...]do{n.push({x:e,y:t,colour:r,width:1,height:1}),e+=c,t+=h}while(u--);

n.push({x:50,y:50,colour:"ff0000",width:1,height:1});
n.push({x:51,y:50,colour:"00ff00",width:1,height:1});
n.push({x:50,y:51,colour:"0000ff",width:1,height:1});
n.push({x:51,y:51,colour:"421337",width:1,height:1});

this.addLines(n)},n.isHittingBoard=function(e){return[...]
The above code will simply push four different pixels at their respective locations and colours once the user clicks to draw something on the screen using the PixelSV pencil.
Now, it is only a matter of replacing the original code with this patched version.
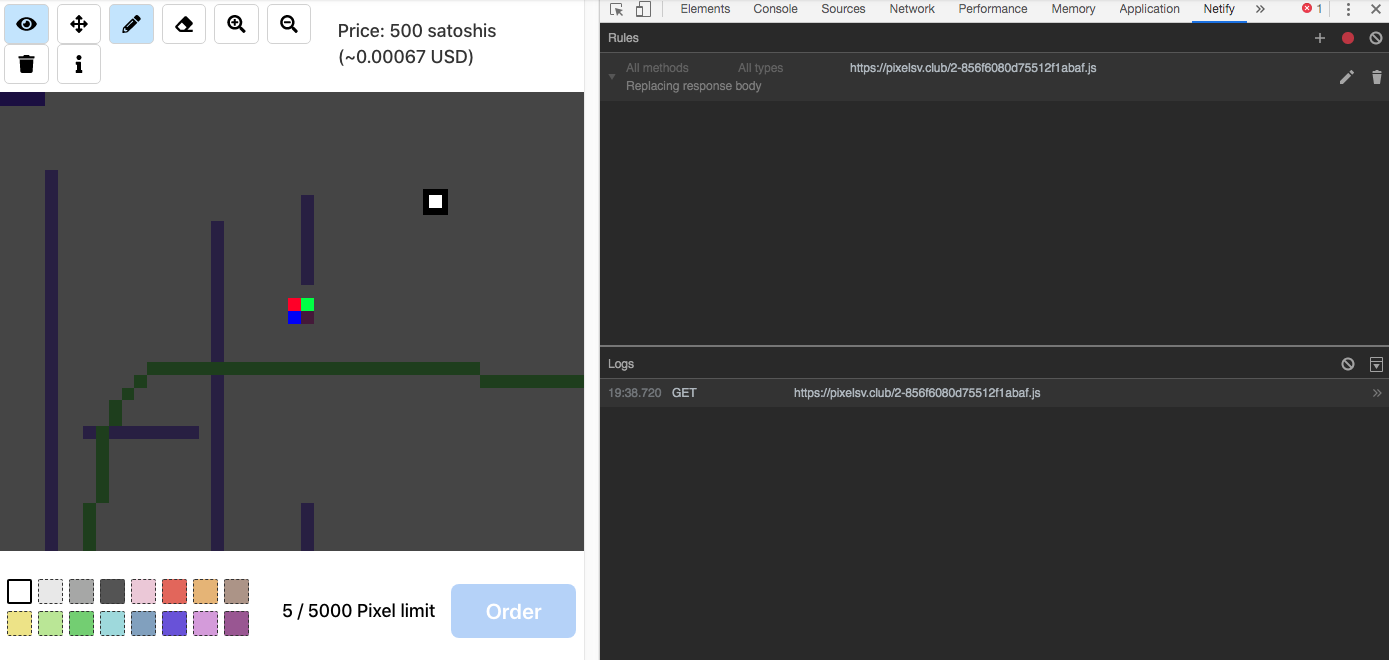
One extension you can use to achieve this on Google Chrome is Netify. It's not a perfect tool and it has its own limitations, but it does the job. There are, of course, other tools you can use, such as Burp to intercept the server responses, or quite possibly you can also modify the JavaScript code stored locally directly through Chrome Devtools (but I'm not sure how).
Once Netify has been instructed to replace the server response of that specific 2-XXXXXXX.js file with your own patched version, you simply have to enable it and reload the page (ensure to flush the local cache if necessary). Then click anywhere on the drawing using the pencil icon and Ta-dah! Your four pixels have appeared in addition to the white one you just drew.
Scripting all the things
Drawing four pixels is fine, but what about an entire picture? Well, it is just a matter of creating a script that will enumerate the pixels of the picture, their location and their colours and ensure to format the output as n.push instructions.
I have created this simple Python script that does the job:
#!/usr/bin/env python2.7
#--------------------------------#
# img2npush for PixelSV
# Author: Klimenos
#--------------------------------#

from PIL import Image

def rgb2hex(r, g, b):
    return '{:02x}{:02x}{:02x}'.format(r, g, b)

# Position on the PixelSV grid (1000x1000) where you wish the image to be drawn
pos_x = 50
pos_y = 100

# Image to load
img = Image.open('image.png', 'r')

if img.mode in ('RGBA', 'LA') or (img.mode == 'P' and 'transparency' in img.info):
    pixels = img.convert('RGBA').load()
    width, height = img.size

    for x in range(width):
        for y in range(height):
            r, g, b, a = pixels[x, y]
            rgbhex = rgb2hex(r, g, b)
            print 'n.push({x:%s,y:%s,colour:"%s",width:1,height:1});' % (x+pos_x, y+pos_y, rgbhex)
Now, bear in mind that the picture needs to be of adequate size, and you are currently limited to submitting 5,000 pixels at a time. Therefore, you will eventually need to split the script output into several parts, either by hand or using a more elaborated version of the script.
The script will produce the list of n.push lines you need to manually add to the 2-XXXXXXX.js file. Once the modified JavaScript code is ready, use Netify to load it next time the page is refreshed (and cache flushed).
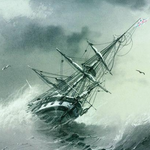
And that is how I drew the CSW picture you can (hopefully) still see on PixelSV.

Transparency and anti-aliasing
Unfortunately, PixelSV does not implement pixel alpha transparency. As you've already noticed, it only allows for RGB colours (8 bits for each channel, which have integer values from 0 to 255). Therefore, if you wish your drawing to integrate "fake" transparency and anti-aliasing, you'll need to use some tricks.
First of all, you need to identify the colour used for the canvas background. Which is easy to find: just screenshot the canvas, use a Colour Meter application or simply find it in the code. You will discover the colour is the following light grey: #dcdcdc.
Now, let's find a transparent picture, preferably one that uses RGBA. The additional alpha transparency channel will allow not only to have transparent areas on the picture, but also deal with anti-aliasing (using existing semitransparent pixels). That way, you can easily replace the transparent background of the picture with the #dcdcdc light grey. Those semi-transparent pixels will blend with the grey colour and become RGB-only pixels and will create the illusion that they are still semi-transparent when displayed on a grey canvas.
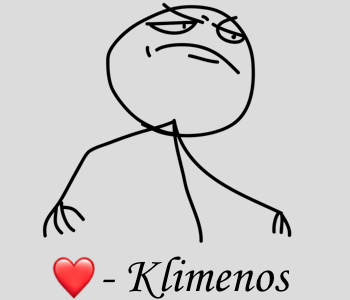
I decided to go for the following PNG of the Fuck Yea meme:
I have then resized it, changed the background to #dcdcdc and added some text with a ❤️ emoji.
But I also didn't want to draw the light grey pixels I would unnecessarily add to the drawing. So, I customised my script not to output those pixels (it's just one line of code). I also changed the picture position of the top left pixel so it's centred on the canvas (I will let you figure out this part on your own).
#!/usr/bin/env python2.7
#--------------------------------#
# img2npush for PixelSV
# Author: Klimenos
#--------------------------------#

from PIL import Image

def rgb2hex(r, g, b):
    return '{:02x}{:02x}{:02x}'.format(r, g, b)

# Position on the PixelSV grid (1000x1000) where you wish the image to be drawn
pos_x = 600
pos_y = 250

# Image to load
img = Image.open('image.png', 'r')

if img.mode in ('RGBA', 'LA') or (img.mode == 'P' and 'transparency' in img.info):
    pixels = img.convert('RGBA').load()
    width, height = img.size

    for x in range(width):
        for y in range(height):
            r, g, b, a = pixels[x, y]
            rgbhex = rgb2hex(r, g, b)
            if rgbhex != 'dcdcdc':
                print 'n.push({x:%s,y:%s,colour:"%s",width:1,height:1});' % (x+pos_x, y+pos_y, rgbhex)
I had to split the n.push list into several lists because it was too long. Also, the application had a bug and some parts didn't make it after I swiped Money Button... so I had to resubmit some several times for unknown reasons.
And after all the parts of the image were successfully submitted and acknowledged this was the final result...
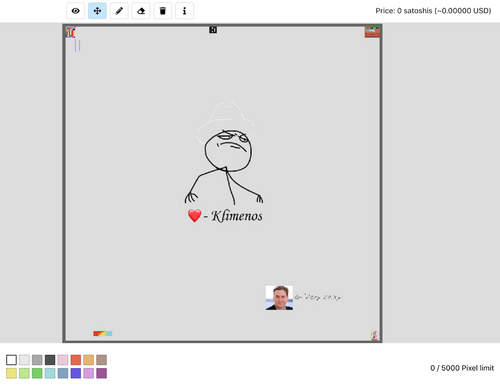
Not only does the drawing look sharp, thanks to anti-aliasing, but I also only paid for the relevant pixels that constitute the image (which excludes the light grey background pixels). This saved a lot in fees for such a big drawing.
To this day you can still draw long thin lines at low cost... until the developer changes this behaviour.
Conclusion
It was a fun little challenge. Not very technical and I believe accessible to most. At the time of writing this article the technique still works. This technique also helps save your drawings, which is useful if you wish to redraw a defaced artwork.
I hope you've enjoyed reading this article. If you use a different technique, I would be happy to read about it in the comments section.
I also hope to see more pictures on PixelSV!